Legs Up the Wall is a quiet resting pose where you lie on your back and place your legs against a wall. You do not need to force your legs straight or press your hips close to the wall. Start with a small, comfortable amount of time and adjust the setup so your back, neck, and breathing feel easy. This guide explains the basic steps, useful props, common adjustments, and when to ask a doctor before trying it.
This article is for general education and is not medical advice. Check with your doctor before trying the pose if you have a health condition, are pregnant, have had recent surgery, or are unsure whether it is suitable for you.
What the pose is
Legs Up the Wall is a supported resting position with your legs raised against a wall. You lie on your back, turn so your hips are near a wall, and rest your legs upward on it. Your knees may stay bent, and your hips do not have to touch the wall. The shape should feel quiet and easy rather than like a stretch you must achieve.
Why people do it
Many people choose this pose as a calm pause at the end of a gentle practice. Its simple setup gives you a reason to lie still and notice your breath for a few minutes. Some people enjoy the feeling of resting their legs in a different position, while others simply like having a supported place to unwind. Preferences and experiences vary from person to person.
A gentle starting point
Begin with the easiest version that lets you breathe and rest without strain. Choose a clear patch of wall and move nearby objects out of the way. Sit sideways with one hip near the wall, then lower your shoulder and head to the floor as you turn your legs upward. If that movement feels awkward, start farther from the wall or ask a teacher to show another entry.
Step 1: choose your space
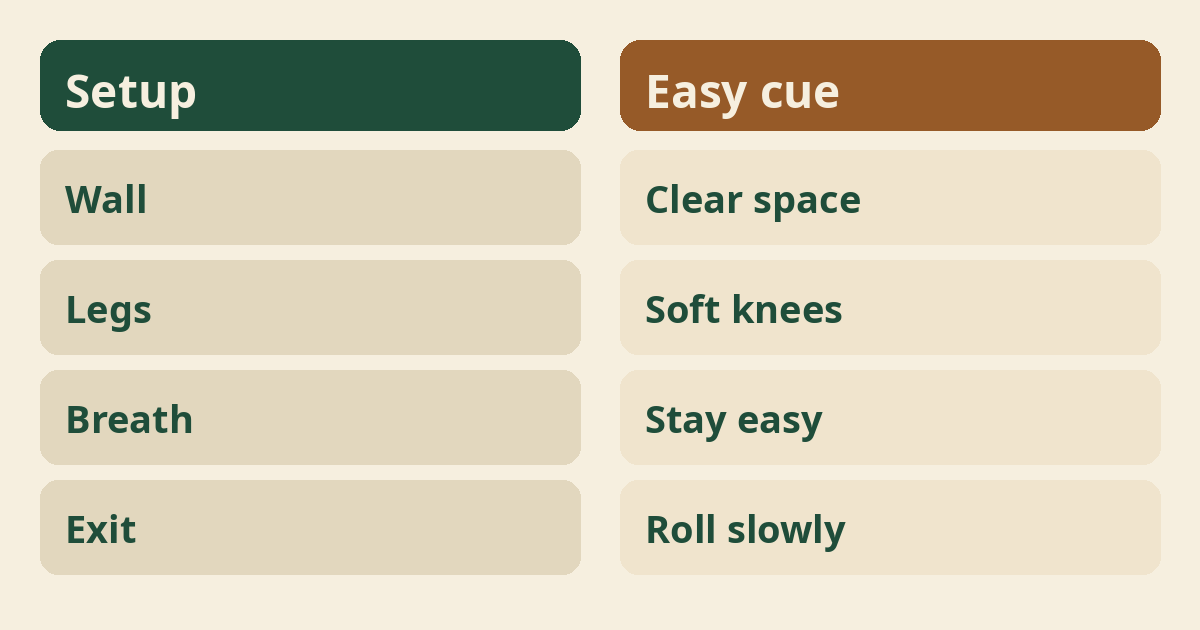
Pick a stable wall and a floor where you can lie down comfortably. A mat, rug, or folded blanket can make a hard floor feel softer, but it should not slide. Leave enough room to roll onto your side and sit up when you finish. Keep the path clear of furniture, pets, and objects that could catch your feet.
Step 2: sit beside the wall
Sit with one side of your body facing the wall before you lower down. Place one hip close to the wall without trying to pin it there. Bend your knees and keep your feet on the floor for a moment. This position gives you a steady starting point and makes it easier to turn onto your back without swinging your legs.
Step 3: turn onto your back
Lower your upper body to the floor while turning your legs up the wall. Move slowly and use your hands for support if needed. Let your legs rest on the wall once your back and head are down. If you land too close or too far away, bend your knees and shuffle your body a little rather than pulling hard on your legs.
Step 4: find your distance
Keep enough space from the wall for your hips and lower back to feel comfortable. A close position is not automatically better. If your hamstrings feel tight, move your hips farther away and let your knees bend slightly. If your back feels compressed or your legs feel stretched, change the distance until the pose feels easy to maintain.
Step 5: settle your legs
Let your legs rest against the wall without locking your knees. Your feet can be relaxed, with toes pointing naturally rather than pulled hard toward you. A small bend in the knees is fine, and your legs may rest slightly apart. Do not push your heels upward or use muscular effort to make both legs look perfectly straight.
Step 6: support your body
Add only the support that makes your body feel more at ease. A thin folded blanket under your head can help keep your neck comfortable, while a blanket over your body may feel cozy. Avoid a thick pile that tips your head forward or makes your back arch. See basic yoga props for simple ways to choose and place support.
Breathing in the pose
Let your breathing stay natural and unforced. Notice the breath moving in and out without trying to make it deep, slow, or perfectly even. If you want a simple focus, feel the gentle movement around your ribs or belly. A beginner’s guide to belly breathing can offer another easy breath-awareness practice.
How long to stay
Stay only as long as the position remains comfortable and easy to leave. A short pause is enough to learn the setup; you do not have to meet a target time. If you are new to the pose, begin with a few comfortable breaths and see how your body responds. End sooner if you notice discomfort, tingling, dizziness, breathlessness, or a sense that you need to get out.
How often to practise
There is no single schedule that suits everyone. You might use the pose occasionally as a quiet rest, or leave it out if it does not suit you. Notice how you feel during and after rather than turning it into a daily rule. For general planning ideas, read how often to do yoga, then choose a pace that fits your life.
Relaxation without pressure
Resting well does not require an empty mind or a special feeling. Thoughts may come and go while you lie still, and that is normal. You can listen to ordinary sounds, notice contact with the floor, or count a few easy breaths. If a still pose feels uncomfortable emotionally or physically, open your eyes, change position, or choose a different kind of rest.
Common mistake: forcing straight legs
Forcing the knees straight can make the pose less comfortable. Let your knees soften when the backs of your legs feel tight. A small bend does not mean you are doing the pose incorrectly. The aim is a supported resting shape, not a display of flexibility or a contest to get your hips close to the wall.
Common mistake: pressing the hips in
Pressing your hips hard toward the wall is not needed. That effort can pull at the back of your legs or make the lower back feel tense. Move away from the wall until you can rest without pushing. If you cannot find a comfortable distance, skip the pose and ask a qualified yoga teacher for an adjustment.
Common mistake: holding the breath
Breath holding is a sign to make the setup easier or leave the pose. Check whether your ribs and belly can move comfortably and whether your jaw and shoulders can soften. If the position makes breathing feel restricted, bend your knees, move farther from the wall, or sit up. Do not try to overcome breath discomfort by staying longer.
Common mistake: staying too long
A longer hold is not automatically more useful. Pay attention to your comfort instead of a timer or a goal set by someone else. End the pose while you can still move calmly and steadily. If numbness, pain, or unusual sensations develop, come out carefully and seek appropriate advice if they continue or concern you.
Using a folded blanket
A folded blanket can make the floor feel softer when it lies flat and stable. Place it under your head or torso only if that position feels better. Avoid raising your hips on a high stack unless a qualified teacher has shown you a setup that suits you. If the blanket slides, bunches, or changes your balance, remove it.
Using a chair instead
A chair can offer a lower-leg rest if the wall version is not comfortable. Lie on your back and place your calves on a stable chair seat, with your knees bent at a comfortable angle. Make sure the chair cannot roll or tip, and do not climb onto it while unsteady. A teacher can help you compare options if you are uncertain about the setup.
Coming out slowly
Leave the pose by bending your knees and rolling onto your side. Pause there for a few breaths before using your hands to sit up. Moving in stages gives you time to notice how you feel after lying still. Avoid swinging your legs down quickly or sitting up in one sharp movement.
After the pose
Take a moment to check in before returning to activity. Notice your breathing, your back, and how steady you feel when seated. You can then stretch your legs gently or move into an easy position such as Child’s Pose if that feels comfortable. There is no need to add another pose if you would rather finish.
Who should check with a doctor first
Ask your doctor before trying the pose if you have a health condition or a recent change in health. This is especially important if you are pregnant, have had recent surgery, have ongoing pain, or have concerns about circulation, blood pressure, eyes, or balance. Your doctor can consider your own situation and explain whether an altered position is appropriate. Do not use a general online guide to make that decision for you.
When to stop
Stop if the pose causes pain, unusual pressure, dizziness, tingling, or difficult breathing. Bend your knees and roll to your side slowly, then sit up only when you feel ready. If a new or severe symptom worries you, seek medical advice rather than trying to manage it with yoga. Comfort is a more useful guide than completing a planned number of minutes.
Is this a treatment?
No, Legs Up the Wall is a yoga resting pose, not a treatment for a health condition. It should not replace care from a doctor or delay getting a symptom checked. Do not rely on the pose to manage unexplained swelling, pain, or other new concerns. If you have a diagnosis or a care plan, ask your health professional before adding a new practice.
Possible benefits
Many people find the pose restful, but experiences and results vary. Some people enjoy taking a quiet pause, noticing their breath, or resting with their legs supported. These are personal experiences, not a promise of a health outcome. For general information about yoga research, see National Center for Complementary and Integrative Health and consider how the limits of general information apply to your own situation.
How it differs from a stretch
The pose can be restful without being a flexibility exercise. You may feel a mild pull behind the legs, but you should not chase a strong stretch. If you want to work on flexibility, use a gradual practice with movements that suit your body, such as the ideas in beginner yoga for flexibility. Let comfort guide the range you choose.
Pairing it with other poses
You can use this pose by itself or after gentle movement. Some people like to settle with a few relaxed movements first, while others prefer a quiet finish. Avoid adding poses just to make the routine longer. If you are learning a sequence, a teacher can help you place rest and movement in an order that feels manageable.
A teacher’s role
A qualified yoga teacher can help you adjust the setup to your comfort. Ask for guidance if you are unsure how far from the wall to sit, how to use support, or how to come out. Share relevant limitations before class, and do not feel pressured to copy another student’s shape. A teacher’s suggestion does not replace medical advice when a health concern is involved.
Mindset for beginners
Treat the pose as an invitation to rest, not a test to pass. Your body may feel different from day to day, so repeat the setup only when it feels suitable. You can make small changes, keep your eyes open, or end early. A useful practice is one you can choose freely and leave without feeling that you failed.
If your back feels uncomfortable
Change the angle or leave the pose if your back does not feel at ease. Move your hips away from the wall, bend your knees, or try resting your calves on a chair. Do not try to stretch through back pain or force your pelvis into a particular tilt. If you have a bad back or ongoing symptoms, review guidance on yoga with back pain with your doctor before practising.
If your neck or shoulders feel tense
Adjust your head and arms so they can rest without effort. Keep your head supported by the floor or a thin folded blanket, and let your arms rest wherever they feel natural. Avoid turning your head sharply or pressing your shoulders down. If discomfort continues, come out and consider a gentler option such as gentle yoga for the neck and shoulders.
Making the pose your own
A comfortable version may look different from the picture in a yoga book. You can bend your legs, leave more space from the wall, use a chair, or choose another resting posture. There is no need for your body to make a precise angle. Choose the option that lets you breathe freely and move out safely.
A simple first practice
Keep the first attempt short and focus on learning the entry and exit. Set up the space, lie down slowly, and adjust your distance before settling. Stay for a few easy breaths, then bend your knees and roll onto your side. This small practice teaches the sequence without asking you to stretch, hold, or accomplish more than feels comfortable.
Frequently asked questions
Common questions often concern wall distance, leg position, and whether the pose is right for everyone. The answers below give general guidance, but they cannot account for your health history or personal needs. When you are unsure about safety, check with a doctor or a qualified yoga teacher before trying the pose. It is also fine to choose a different way to rest.
Where to read next
For a calm, beginner-friendly start, Ranjana Sinha’s Begin Where You Are is written for people who want simple steps. Our guide to starting a home yoga practice adds a gentle routine you can follow at home.
Frequently asked questions
Do my hips need to touch the wall?
No, stay far enough away for your back and legs to feel comfortable.
Do my legs have to be straight?
No, a gentle bend in the knees is fine.
How long should I stay?
Stay only while you feel comfortable and can leave the pose easily.
Can I use a chair instead?
Yes, a stable chair may support your calves if the wall setup does not suit you.
Is the pose suitable for everyone?
No, ask your doctor first if you have a health condition, are pregnant, or are unsure.
The bottom line
Start gently, make comfort the priority, and ask your doctor if you are unsure whether this pose is right for you.