You do not need a studio, a flexible body, or an hour of free time to practise yoga. You need a corner of a room, a few honest minutes, and a way to begin that is simple enough to repeat tomorrow. This guide walks you through exactly that: how to set up, what to practise, how often, and how to keep going past the first enthusiastic week.
Everything here is written for a complete beginner. If you have never done a single pose, you are in the right place. If you tried yoga years ago and drifted away, you are also in the right place.
Why Practise Yoga at Home
A class has its place. A good teacher watches your alignment, answers questions, and gives you energy you can borrow. But for most people, the biggest obstacle to yoga is not the practice itself. It is getting to the practice. Travel time, fixed schedules, fees, and the quiet worry of being the stiffest person in the room stop more people than any difficult pose ever has.
Home practice can reduce some of those practical obstacles. There is no commute and no comparison. You can practise at 6 in the morning or 10 at night. You can pause a session when the doorbell rings and come back to it. You can repeat the same simple routine for a month without anyone judging you, which is exactly how a body actually learns.
There is one more quiet benefit. When you practise alone, you start listening to your own body instead of watching a teacher or a neighbour. That attention, turned inward, is the heart of yoga. The poses are just the occasion for it.
What You Actually Need (and What You Don’t)
The yoga industry would like you to believe you need a mat that costs as much as a month’s groceries, special clothing, blocks, straps, bolsters, and a scented candle. You don’t. Here is the honest list.
The essentials
- A clear patch of floor. About the length of your body and an arm’s width extra. A living room corner, a balcony, or the side of your bed all work.
- A non-slip surface. A yoga mat is ideal, but a firm carpet or a folded blanket that does not slide will do for the gentle practice in this guide.
- Comfortable clothing. Anything you can bend and breathe in. A t-shirt and track pants are perfect.
- 15 to 20 minutes. Not an hour. Consistency with 20 minutes beats a heroic 90-minute session once a fortnight.
Nice to have, not required
- A cushion or folded blanket to sit on. Raising the hips slightly makes cross-legged sitting far more comfortable for most beginners.
- A chair nearby for balance. If standing balances feel wobbly, there is no shame in holding a chair. Our chair yoga routine is built entirely around this idea.
- A water bottle for after the practice, not during.
That is all. If your body is over 50, stiff, or carrying an old injury, you do not need extra equipment to begin. You need extra patience, and this guide will remind you of that more than once.
How a Home Session Is Structured
Whether a session lasts 10 minutes or 60, a well-shaped practice has the same four parts. Think of them as opening the body, using the body, calming the breath, and resting. Skipping the first or the last is the most common beginner mistake.
1. Arriving (2-3 minutes)
Sit down comfortably, on the floor or on a chair. Let your hands rest. Take five to ten slow breaths and simply notice them. This is not wasted time. It tells your nervous system that the rushing part of the day is paused, and it turns a set of exercises into a practice.
2. Gentle movement (10-15 minutes)
Simple poses that warm the spine, hips, and shoulders. Slow is the rule. You are not stretching to a limit; you are exploring a range. A routine is given below.
3. Breath work (3-5 minutes)
A few minutes of deliberate breathing settles everything the movement stirred up. If you are new to this, start with deep belly breathing: one hand on the stomach, breathe in so the hand rises, breathe out so it falls. Our pranayama guide for beginners covers five safe techniques in detail, with a 5-minute daily routine you can bolt onto the end of any session.
4. Rest (3-5 minutes)
Lie on your back, arms slightly away from the body, palms up, and do nothing. This is shavasana, and it is where the practice settles into the body. Many beginners skip it because it looks like nothing. Experienced students protect it because it is everything.
A Simple 20-Minute Beginner Routine
Do this routine three to five times a week for your first month. Move slowly, breathe through your nose, and never push into pain. A mild stretchy sensation is fine; sharp, pinching, or joint pain is a stop sign, not a challenge.
Arriving (2 minutes)
Sit cross-legged on a cushion, or on a chair with both feet flat. Close your eyes. Take ten slow breaths, counting each exhale from one to ten.
Neck and shoulder release (2 minutes)
Still seated, drop your right ear toward your right shoulder. Hold for three breaths, then switch sides. Then roll both shoulders up, back, and down, five times slowly. Most of us carry the day’s tension in these few inches of the body.
Seated side bends (2 minutes)
Place your left hand on the floor beside you, sweep your right arm overhead, and lean gently left. Three breaths, then change sides. Keep both sitting bones grounded.
Cat and cow (3 minutes)
Come onto hands and knees, wrists under shoulders, knees under hips. As you breathe in, let your belly soften down and lift your chest and gaze a little. As you breathe out, round your spine gently toward the ceiling. Move with the breath, eight to ten slow rounds. This one movement cares for the whole spine.
Child’s pose (2 minutes)
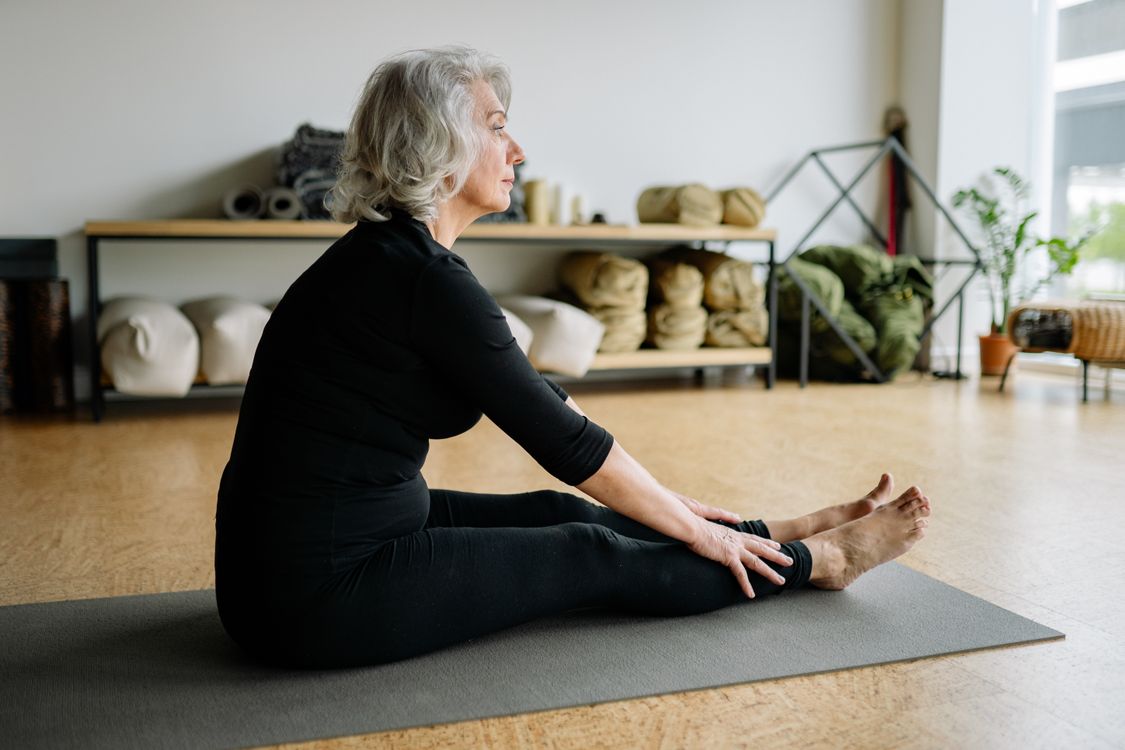
From hands and knees, sit your hips back toward your heels and fold forward, arms stretched ahead or resting by your sides. If your hips do not reach your heels, place a folded blanket between them. Stay for six to eight breaths. This is your resting place whenever the practice feels like too much.
Mountain pose with a gentle backbend (2 minutes)
Stand tall, feet hip-width apart. Feel your weight spread evenly across both feet. As you breathe in, sweep your arms overhead and lift your chest slightly. As you breathe out, lower the arms. Repeat five times, moving only as far as comfortable.
Standing forward fold (2 minutes)
From standing, bend your knees a little and fold forward, letting your head and arms hang. Keep the knees soft and use a small hip hinge, with hands supported on the thighs if helpful. Bent knees do not make a forward fold suitable for every back condition. If bending is uncomfortable or you have been told to avoid it, remain upright. Return to standing slowly with support.
Breathing (3 minutes)
Sit comfortably again. Practise deep belly breathing: inhale for a count of four, exhale for a count of four, for about three minutes. Do not force the count. If you feel dizzy, stop the breathing exercise, return to ordinary breathing and rest. Seek medical advice if dizziness persists or recurs.
Shavasana (2-3 minutes)
Lie down on your back and let everything go. Use support or a side-lying or seated position if lying on your back is uncomfortable. You can open your eyes or finish sooner; there is no need to endure discomfort.
That is the whole practice. No headstands, no pretzel shapes, nothing you will need to recover from. If even this feels like a lot on some days, do the first and last parts only. Two minutes of arriving and two minutes of rest still count.
Setting Up Your Practice Corner
You do not need a yoga room. You need a spot your mind can learn to associate with practice, the way a bed means sleep. Choose a corner with enough floor to lie down in, decent light, and as little foot traffic as your home allows. Keep your mat and cushion there, or within arm’s reach. If the phone is the biggest source of noise in your life, let the corner be the one place it does not follow you; twenty minutes of unreachable time will not cost you anything that matters.
Small touches help some people: a plant, a lamp instead of the tube light, a window opened a crack. None of these are necessary. The only real requirement is that when you step into the corner, your shoulders drop a little. Build that association and the habit is half done.
A Simple Weekly Rhythm
If you would rather follow a plan than invent one, here is a gentle first-month rhythm. Three practice days a week, say Monday, Wednesday, and Friday: the full 20-minute routine above. Two quiet days, say Tuesday and Saturday: only the breathing and the rest, about eight minutes. Two full rest days, where the only practice is noticing your posture once or twice during the day.
After the first month, add a fourth full session if the body asks for it. After the second month, extend two of the sessions to 30 minutes by holding each pose a few breaths longer. Grow the practice the way you would grow a plant: regularly, lightly, and without yanking on it to check the roots.
How Often, How Long, and How to Make It Stick
Beginners usually ask “how long should a session be?” when the better question is “how many days a week will I actually show up?” Three manageable sessions may be easier to keep than an ambitious routine that leaves you dreading the next attempt. Choose a schedule you can repeat comfortably rather than treating twenty minutes as a medical dose.
A few things that genuinely help the habit survive:
- Anchor it to something you already do. After morning tea, before your bath, right after you come home. A practice attached to an existing habit borrows its strength.
- Same place, same time. The brain loves cues. A fixed corner and a rough time of day remove the daily negotiation.
- Keep the mat visible. Rolled in a cupboard, it will be forgotten. Leaning against the wall, it will remind you.
- Lower the bar on bad days. Promise yourself only five minutes. Most days you will continue past five. On the days you don’t, you kept the chain unbroken, and that is the real victory.
- Track it gently. A tick on a calendar is enough. You are building a relationship, not chasing a score.
Expect the first two weeks to be powered by enthusiasm and the third week to test you. That third week is where most home practices quietly die. Plan for it: tell a family member, put the calendar somewhere public, and look for small changes in how comfortable the practice feels. There is no universal week when stiffness, sleep or mood must improve. If you miss a day, resume when you can rather than judging the whole practice.
Common Mistakes Beginners Make at Home
- Practising like a video. Online teachers demonstrate ideal shapes. Your job is not to copy the shape; it is to feel the stretch. Their knee is straight after fifteen years. Yours can bend.
- Skipping the warm-up and the rest. The middle looks like the workout, but the ends are where safety and benefit live.
- Holding the breath. If you notice you are straining and not breathing, you have gone too far. Back off until you can breathe smoothly again.
- Comparing day to day. Some days the body is open, some days it is not. Weather, sleep, and mood all change your range. Neither day says much about your progress; the trend over a month does.
- Doing too much too soon. Soreness that lasts two days is a sign you pushed. Yoga should leave you feeling better when you finish than when you started. If it doesn’t, do less next time.
Staying Safe Without a Teacher in the Room
Even gentle yoga can cause injury, and learning without supervision can increase risk. A qualified teacher can help you adapt movements and recognise when a pose is not right for you. The following precautions reduce avoidable risks but cannot guarantee safety.
- Pain is information. Stretching sensation in a muscle is normal. Pain in a joint, anything sharp, or anything that lingers after the session means stop and, if it persists, speak to a doctor.
- Work with your conditions, not against them. High blood pressure, glaucoma, recent surgery, pregnancy, and back or neck problems all change what is sensible. Check with your doctor before starting, and favour the gentle ends of every instruction here.
- Avoid inversions for now. Headstands and shoulder stands need supervision. There is a lifetime of benefit available without them.
- Rise slowly. Standing up quickly after lying or folding can make anyone light-headed, especially after deep breathing. Take your time.
- Practise on an empty-ish stomach. Two to three hours after a full meal is comfortable for most people.
If getting down to the floor is difficult, our chair yoga practice offers chair-supported options. Individual needs matter more than age alone, and seated movements may still need modification.
Where to Go Next
Once the routine above feels familiar, you have several natural directions, and all of them can start at home.
Add breathing depth. Pranayama is the limb of yoga that most home practitioners underuse, and the one many find most calming. Start with the five beginner techniques here.
Add stillness. If sleep or a busy mind brought you to yoga, yoga nidra is a lying-down guided rest practice that pairs beautifully with an evening session.
Add understanding. If you become curious about where all this comes from, the complete guide to the benefits of yoga and our beginner’s introduction to Kriya Yoga are good next reads. And if you like learning from the page, the free PDF and ebook library has practice guides you can download and keep by your mat.
And when you feel ready for a teacher’s eye, even occasionally, that is what classes and courses are for. A month of honest home practice makes you a far better student than day-one enthusiasm ever could.
Frequently Asked Questions
How long before I see results from home yoga?
There is no reliable timetable for everyone. Changes depend on the practice, frequency, health, sleep and many other factors. Notice comfort and consistency rather than expecting a result by a deadline. Research on yoga programmes cannot predict exactly what this home routine will do for you.
Is 20 minutes of yoga a day enough?
Twenty minutes can be a manageable practice window, but it is not a proven threshold for particular benefits. Start with less if needed, add time gradually, and keep other forms of activity in your week. Yoga varies in intensity, so not every session provides the same strength or aerobic exercise.
Can I learn yoga at home without any teacher, ever?
Home practice can support learning, but it does not replace individual instruction. NCCIH notes that unsupervised learning has been associated with increased injury risks. If possible, begin with a qualified teacher, especially if you have a health condition, injury or uncertainty about a movement.
What is the best time of day to practise?
The time you will actually keep. Morning practice sets a calm tone and is easier to protect before the day makes claims on you. Evening practice releases the day and helps sleep. Both are correct. Pick one, keep it for a month, and let your own experience decide.
Do I need to be flexible before starting yoga?
No, and this belief stops more people than any other. Yoga is how you become flexible; flexibility is the result, not the entry requirement. Every instruction in this guide assumes a stiff, ordinary body. Start where you are, and where you are will change.
Evidence, Safety and the Limits of This Guide
NCCIH’s review of yoga research and safety describes possible benefits for sleep, stress and balance, while explaining that study results vary across yoga styles and groups. It also recommends qualified instruction and individual modifications for pregnancy, older adults and people with health conditions. This beginner routine is educational, not a personalised treatment programme.
Stop if you develop pain, dizziness, chest discomfort or unusual breathlessness. Do not practise through symptoms to complete a timer. Pregnancy, glaucoma, osteoporosis, significant blood-pressure concerns, recent surgery and back or neck problems can change which movements are suitable. Ask your health professional and teacher for guidance. Yoga should never be used to delay assessment of a medical problem.