Warrior pose preparation means warming up gently, finding a stable standing base, and learning a shallow lunge before adding longer holds or raised arms. You do not need wide splits, a deep knee bend, or a picture-perfect shape to begin. This guide focuses mainly on preparing for Warrior II, with notes on how Warrior I differs. Start with a chair nearby, leave room to step safely, and choose movements that let you breathe without strain throughout your practice.
This article offers general education and is not medical advice or a personal exercise plan. If you have a health condition, an injury, recent surgery, pregnancy-related concerns, or uncertainty about standing exercise, check with your doctor before trying these movements.
What is warrior pose preparation?
Preparation is a short practice that introduces the movements and balance demands of a warrior stance. It can include easy walking, ankle movement, a small knee bend, and supported standing. The aim is to arrive with useful feedback about your body, rather than force yourself into the final pose before you feel ready.
Why do people prepare first?
People prepare first to make an unfamiliar standing shape easier to understand. Warrior poses ask your feet, legs, trunk, and arms to work together while you stay balanced. Exploring those pieces separately gives you time to notice where you need a shorter stance, a prop, or a different movement today.
Which warrior pose comes first?
A supported, shallow Warrior II is one possible starting point, rather than a required first pose. Its open stance lets you practise a front knee bend without reaching overhead. Warrior I uses a different relationship between the feet and pelvis, so learn its setup separately instead of treating the two shapes as interchangeable.
How do you start?
Begin beside a sturdy chair on a clear, nonslip surface. Wear clothing that lets you step freely, and move furniture out of your stepping path. Stand quietly for a few breaths, then notice whether both feet feel grounded; mountain pose basics can help you explore this simple starting position.
Step one: warm up gently
Start with a minute or two of comfortable walking or marching near support. Keep the pace easy enough for normal conversation, and let your arms hang naturally. You are checking how standing movement feels today, not trying to become tired before practice; skip anything that brings on pain or lightheadedness.
Step two: explore the ankles
Move your ankles through a small, comfortable range while holding your chair. Try gently lifting both heels and lowering them with control, or moving one foot at a time if that feels steadier. Keep the movement modest and the support close; you do not need a large range to learn how your feet respond.
Step three: practise a small knee bend
Bend both knees a little while keeping your feet comfortably apart and your hands supported. Let your knees travel in the same general direction as your toes, without forcing a rigid position. Straighten slowly and repeat a few times, noticing whether you can control the movement without gripping your jaw or holding your breath.
Step four: choose the stance
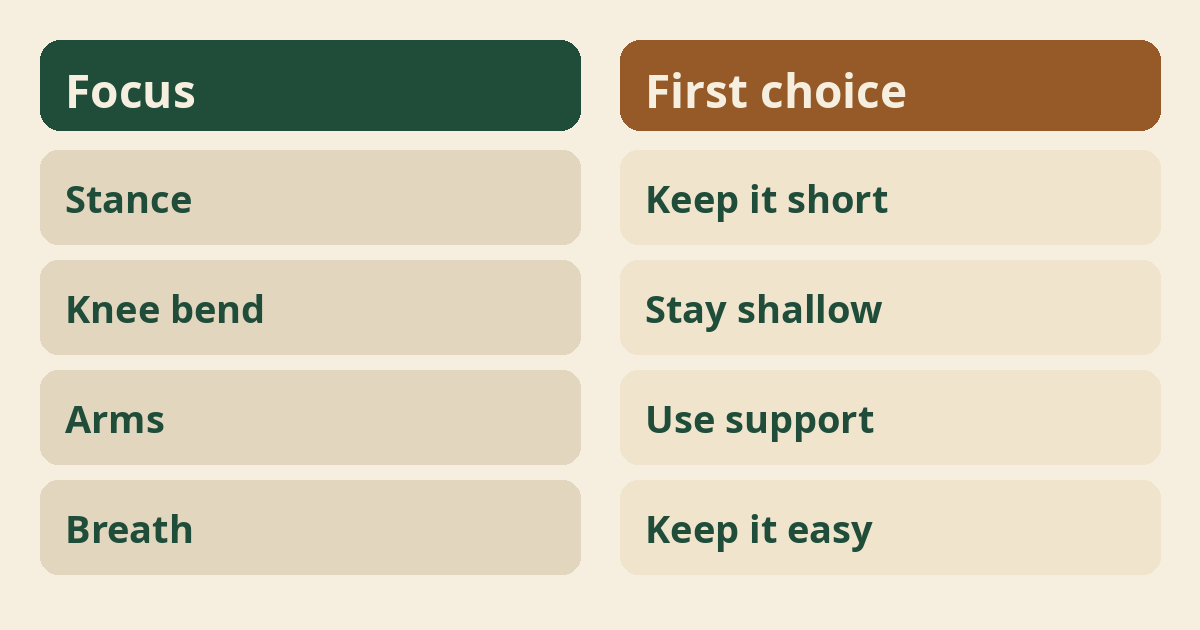
Step your feet apart only as far as you can manage without losing easy control. For a Warrior II exploration, turn the front foot toward the short end of your mat and angle the back foot comfortably inward. Keep the stance shorter than a demonstration photo if a wider position pulls or feels unstable.
Step five: bend the front knee
Add a shallow bend to the front knee while the back leg stays comfortably long. Let the front knee follow the direction of the front toes rather than dropping inward. There is no need to bring the thigh parallel to the floor; a smaller bend is a complete and useful practice choice.
Step six: add the upper body
Keep your hands on your hips or support before trying arms held out to the sides. Let your chest face broadly toward the long side of the mat without twisting your pelvis to an extreme. Raise the arms only if your shoulders stay comfortable, and look forward instead of turning your head if that feels easier.
How should you breathe?
Breathe naturally and keep the breath moving throughout the stance. You do not need a special count or breath hold to make this practice worthwhile. If breathing becomes effortful, straighten the front knee or step out; gentle breathing practice is a separate option for learning to notice the breath at rest.
How long should you hold?
Start with one or two easy breaths rather than aiming for a long hold. Come out while you still feel able to move smoothly, then pause before repeating or changing sides. A brief, steady attempt can tell you more about a suitable setup than a longer hold that ends in shaking, pain, or breath strain.
How often can you practise?
Choose a frequency that leaves you comfortable during practice and afterward. You might try a few short sessions across the week, with rest or different movements between them as needed. There is no streak to protect; choosing your yoga frequency can help you think about consistency without making every day a test.
What are common mistakes?
Common mistakes include stepping too wide, bending too deeply, and copying another person’s proportions. Your leg length, balance, and comfortable joint movement may differ from the person in a video. Change one thing at a time, and avoid repeatedly correcting your body toward a shape that already feels painful or difficult to control.
What should the front knee do?
The front knee should move in a comfortable direction that broadly matches the front foot. If the knee drifts inward or you feel a twisting sensation, reduce the bend and reconsider your foot placement. Do not force the knee outward with your hand; persistent discomfort calls for individual guidance rather than another alignment trick.
How should the back foot feel?
The back foot should feel stable without a painful twist through the ankle or knee. If you cannot keep a comfortable base, shorten the stance or adjust the foot angle slightly. Pressing harder is not always the answer, and neither is lifting the heel without guidance, because that changes the balance demands of the pose.
Should you tuck the pelvis?
Avoid forcing a strong pelvic tuck or an exaggerated arch in your lower back. Let your trunk stay comfortably upright, with enough freedom to breathe and bend the front knee. If a cue makes you tense more, return to a smaller stance and ask a teacher for a simpler explanation suited to your body.
Which props are useful?
A sturdy chair or a wall can make the first attempts easier to control. Use a chair that will not roll or slide, and position it where you can reach without leaning awkwardly. See simple yoga props for other support ideas, remembering that equipment should make the setup clearer rather than more complicated.
Can you keep your hands supported?
You can keep one or both hands supported for the whole practice. Raised arms are optional, especially while you learn the leg position or manage shoulder fatigue. A teacher can help place your chair so that reaching it does not pull your torso forward or make you twist away from the stance you intended.
Who should be careful?
Ask your doctor first if an injury, medical condition, or balance problem may affect standing exercise. This is especially important after surgery or with unexplained dizziness, significant joint pain, or restrictions from your care team. Pregnancy may also change suitable choices; prenatal yoga differences explains why a general beginner routine is not automatically the right fit.
Is this a treatment?
Warrior pose preparation is not a treatment for knee pain, back pain, anxiety, or any medical condition. Use it as an optional movement practice, not as a substitute for assessment or prescribed care. If you hope yoga will address a symptom, discuss that goal with your clinician before deciding which exercises belong in your routine.
What benefits might you notice?
Many people find that gentle preparation makes standing practice feel more familiar, though results vary. You may notice better awareness of foot placement, effort, and the point at which you need support. Broader yoga benefits depend on the person and practice, not one pose; read general yoga information at National Center for Complementary and Integrative Health without taking it as a promise about this sequence.
What sensations are acceptable?
Mild muscular effort can be expected, but pain is not a target to work toward. Reduce the stance or stop if you notice joint pain, sharp pulling, tingling, or numbness. Stop for dizziness or feeling unwell, and seek appropriate medical help for concerning symptoms instead of trying to finish the pose or stretch them away.
How do you leave the pose?
Straighten the front knee gently and bring the feet closer with small, controlled steps. Keep your support within reach, and avoid spinning on a planted foot while your knee is bent. Pause in comfortable standing before switching sides, especially if turning or stepping quickly tends to make you feel unsteady.
How should you change sides?
Reset the feet deliberately rather than rushing straight into the opposite stance. Give yourself time to find support, choose a comfortable width, and check the new front knee bend. One side may feel different, so use a shorter hold or smaller range there instead of making both sides look identical at any cost.
What if your hips feel stiff?
Shorten the stance and keep the front knee bend modest when your hips feel restricted. More width does not necessarily create a better practice, and forcing the pelvis open can shift strain elsewhere. Outside this sequence, gentle hip practice offers another topic to explore without treating stiffness as something you must defeat.
What if balance feels difficult?
Use support immediately if staying upright takes attention away from comfortable movement. You can practise only the small knee bend and stepping pattern until those feel more manageable. For separate ideas, see beginner balance practice, but seek medical advice for new or unexplained balance changes rather than assuming more yoga is the answer.
How is Warrior I different?
Warrior I generally directs the chest more toward the front of the mat than Warrior II. That change affects the stance and the rotation you ask of the hips and back leg. Do not force both hip points square while keeping the feet fixed; a teacher can help you choose a different stance or supported alternative.
When should you progress?
Progress when you can enter, breathe, and leave the current version without strain. Change only one feature at first, such as adding one breath or briefly lifting the arms. You do not have to make the stance wider or deeper; comfortable control can be your progress even when the outside shape stays much the same.
Can a teacher help?
A qualified teacher can help you find a setup that matches your movement and support needs. Explain any clinician’s restrictions and say which parts feel uncertain before the class begins. Look for someone who welcomes smaller ranges, allows you to stop, and avoids claiming that a single alignment rule suits every knee, hip, or spine.
What mindset is useful?
Treat preparation as practice in noticing, not as an entrance exam for a harder pose. Some days the supported version may be all you want, and that does not make the session unfinished. Replace the question of how impressive the stance looks with whether you can stay attentive, breathe freely, and choose your next movement calmly.
Do you need deep flexibility first?
You do not need deep flexibility before trying an appropriately supported preparation. A small range can introduce the main actions without asking for an extreme stretch. Explore beginner flexibility practice separately if useful, while remembering that flexibility alone does not tell you whether a stance is comfortable, stable, or suitable for you.
Can this fit into a short routine?
A few minutes can be enough to explore the warm-up and one brief attempt on each side. Leave time for stepping in and out instead of squeezing in extra holds. Finish with comfortable standing or sitting, and notice how you feel later before deciding whether the same amount makes sense for your next practice.
What should you remember next time?
Start again with today’s comfortable range rather than yesterday’s widest stance. Check your support, take a small knee bend, and let the first attempt guide the rest of the session. Familiarity is useful, but it is not an instruction to ignore fatigue, new discomfort, or a change in your health circumstances.
Where to read next
For a calm, beginner-friendly start, Ranjana Sinha’s Begin Where You Are is written for people who want simple steps. Our guide to starting a home yoga practice adds a gentle routine you can follow at home.
Frequently asked questions
Must I warm up before Warrior II?
A gentle warm-up is a useful way to check how standing movement feels before you add a wider stance.
Do my feet need to line up exactly?
No single foot line suits everyone, so choose a stable setup and ask a teacher if positioning feels confusing.
Can I practise without raising my arms?
Yes, your hands can stay on your hips or sturdy support throughout the pose.
Should my front thigh be parallel to the floor?
No, beginners can use a shallow knee bend without aiming for that depth.
What if my knee hurts afterward?
Stop the provoking movement and seek medical advice if pain persists, worsens, or concerns you.
The bottom line
Let warrior pose preparation give you a steady place to start, with a smaller stance, useful support, and no need to force the final shape.