A low lunge stretch is a supported kneeling position that gently lengthens the front of the hip on the leg placed behind you. Start with a short stance, a padded knee, and your hands on a chair or blocks so you can stay steady. The pose is optional, and it should feel manageable rather than forceful. This guide explains a careful setup, breathing, adjustments, and when to ask a clinician before trying it.
This article is general education, not medical advice. Check with your doctor before trying a new movement if you have a health condition, injury, pain, or concerns about whether it is suitable for you.
What a low lunge is
A low lunge is a kneeling position with one foot forward and the other knee resting behind you. The front knee bends while the back hip may feel a mild lengthening at its front. Keep your hands supported and your torso upright or slightly inclined. There is no need to copy a deep shape.
Why people try it
People often use a low lunge as a gentle way to explore hip movement. It can be part of a warm-up, a mobility break, or a yoga sequence. The experience differs from person to person, so treat it as one comfortable position rather than a required pose. A steady chair-supported alternative is equally valid.
What it stretches
The pose may create a mild stretch around the front of the back hip and thigh. Sensation can vary with stance length, pelvic position, and individual anatomy. The front leg also bends, so adjust its position to keep the knee comfortable. A strong pull is not a sign that the pose is working better.
How to begin
Begin beside a stable chair or wall, with a folded blanket ready for your back knee. Clear nearby objects so you have room to move in and out. Wear clothing that lets your legs move without catching. If kneeling is uncomfortable, skip the floor version and choose a standing step-back instead.
Step one: set your base
Place both hands on a chair seat or sturdy blocks before lowering to the floor. Step one foot forward and bring the opposite knee down onto padding. Keep the back toes untucked if that feels comfortable, or tuck them for more stability. Move slowly and pause before adjusting your balance.
Step two: place the front foot
Set the front foot far enough forward that you can keep it grounded and steady. The exact distance depends on your body, so make small changes rather than chasing a textbook angle. Let the front knee point in the same general direction as the toes. If it feels pinched, shorten the stance or come out.
Step three: arrange the back leg
Rest the back knee on a folded blanket and let the shin settle behind you. Keep the back foot relaxed, or place the toes down if that gives you a more secure base. Do not force the hips toward the floor. A smaller movement is a complete version of the pose.
Step four: stack and steady
Use your hands for support and bring your chest to a height where you can breathe easily. Let the pelvis face generally forward without squeezing or pushing it into place. Your shoulders can stay relaxed, and your gaze can remain level. If balance is uncertain, keep both hands on the chair throughout.
Step five: make a small shift
If the setup feels stable, move your hips forward only a little until you notice a mild sensation. Keep the movement slow and easy to reverse. Stop before sharp, burning, numb, or joint-focused discomfort. You can also remain still in the starting position; the forward shift is optional, not a test.
Step six: leave with control
To exit, shift your hips back, use your hands, and bring the back leg forward carefully. Avoid springing up or twisting while your knee is on the floor. Take a breath in a comfortable standing position before changing sides. If getting down or up feels difficult, use a chair-based option or skip kneeling.
Breathing
Breathe in a natural, unforced way while you hold the position. Let each breath continue without trying to make it deeper or longer. If you catch yourself holding your breath, ease the pose or return to the chair. Belly breathing may help some people notice a calmer rhythm: belly breathing basics.
How long to hold
A brief, comfortable hold is enough when you are learning the low lunge. Try a few easy breaths, then leave the pose and notice how you feel. There is no universal ideal duration. Shorten the hold or stop sooner if your focus, balance, breathing, or comfort changes.
How often to practice
Practice only as often as feels comfortable and fits your movement routine. You do not need to repeat the stretch daily or increase the time on a schedule. A general guide to planning movement is how often to do yoga, but your clinician’s advice and your own comfort take priority.
Common mistake: forcing depth
Pushing the hips far forward can make the pose feel strained rather than useful. Instead, use a shorter stance and stop at a mild sensation. The front of the hip does not need to touch the floor, and your pelvis does not need to match a picture. Back out at the first warning sign.
Common mistake: losing support
Reaching overhead or lifting the hands too soon can make a beginner feel unsteady. Keep a hand on a chair, blocks, or the floor for as long as needed. Support is a sensible way to manage balance, not a shortcut. If you cannot stay steady, choose another movement or finish the pose.
Common mistake: front knee discomfort
A front knee that feels uncomfortable is a reason to adjust or stop. Check that the foot is grounded and the knee tracks generally with the toes, then try a shorter stance. Do not push through discomfort to achieve a shape. If the feeling continues, leave the pose and ask a qualified professional.
Common mistake: arching the back
Leaning far back may shift the feeling into the lower back. Keep your ribs comfortably over your pelvis and make the movement smaller. You can hold your torso slightly forward with your hands supported. If your back is a concern, review gentle yoga considerations for a bad back with a clinician.
Using props
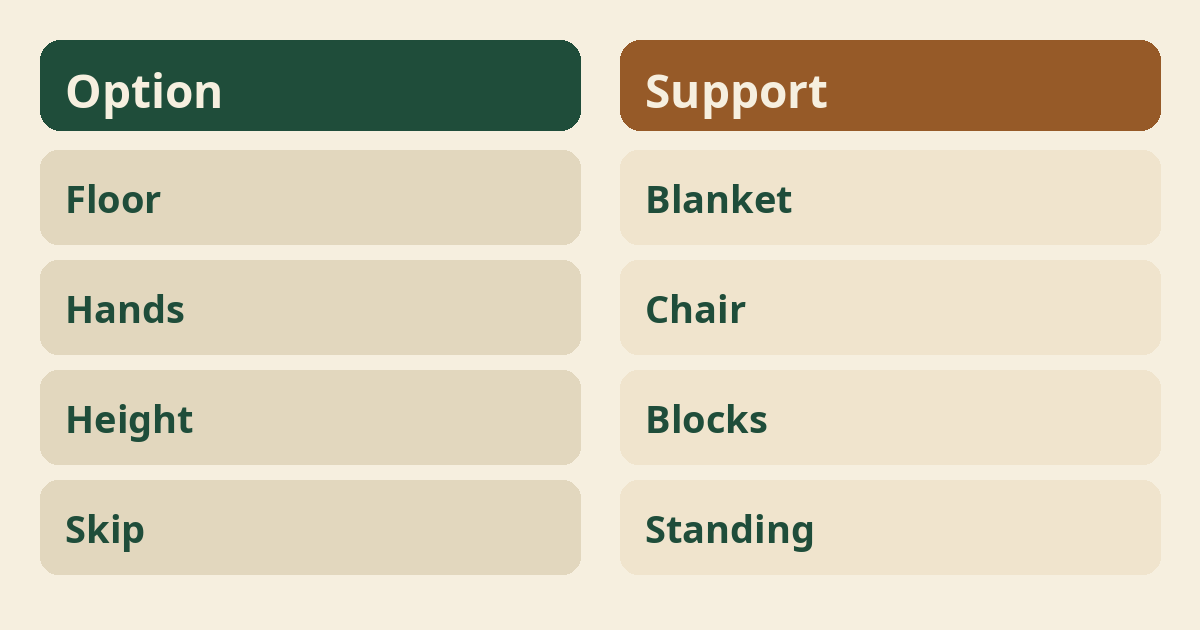
A folded blanket, blocks, and a stable chair can make the setup easier to adapt. Put padding beneath the knee and raise your hands on blocks if the floor feels too far away. A chair can support both hands or help you try a standing variation. See beginner yoga prop ideas for ways to choose simple support.
A chair-based option
You can explore a similar step-back position while standing and holding a chair. Stand behind a stable chair, hold it with both hands, and step one foot back with the heel lifted. Bend the front knee slightly while keeping the back leg comfortable. This is a different shape, but it avoids kneeling on the floor.
Who should be careful
Ask your doctor before trying this pose if you have a condition or injury that could affect kneeling, balance, or hip movement. This includes current pain, recent surgery, joint concerns, pregnancy, or uncertainty about safe movement. A clinician who knows your health can offer advice for your situation. Stop if the pose brings pain, numbness, dizziness, or unusual symptoms.
Is this a treatment?
No, a low lunge is not a treatment for a medical condition. It should not replace an evaluation, prescribed care, or rehabilitation plan. A stretch cannot diagnose the cause of discomfort or promise a particular result. If you are seeking help for symptoms, speak with a qualified health professional instead of relying on a pose.
Possible benefits
Many people find that a gentle lunge gives them a chance to notice hip movement and practice balance. Results vary, and feeling a stretch does not show that a health problem has changed. The NCCIH overview discusses yoga research and safety in general: National Center for Complementary and Integrative Health. Use that resource for broader context, not as evidence that this pose treats a condition.
Choosing a comfortable range
A useful range is one where you can breathe, stay steady, and leave the pose without strain. It may be quite small, especially on a first try or on a day when movement feels different. Your left and right sides may not feel alike. Keep the range that feels manageable rather than trying to make both sides match.
Progressing gradually
Progress can mean making the setup easier to control, not stretching farther. You might first practice with a chair, then use blocks, and later decide whether a small forward shift feels comfortable. Change one thing at a time. If a change brings new discomfort or instability, return to the simpler version.
Switching sides
Change sides only after you have safely left the first position. Stand or sit for a moment, then set up again with the other knee down if that is comfortable. You may notice a different sensation on each side. Do not force equal depth or repeat a side that feels uncomfortable.
Working with a teacher
A qualified yoga teacher can help you find a supported setup and explain options. Tell the teacher about limits that matter to you before practicing, and ask for a chair or no-kneeling variation. A teacher is not a substitute for medical assessment. Choose a class that welcomes questions and lets you opt out without pressure.
Mindset for practice
Treat the low lunge as an experiment in comfort, not a flexibility goal. There is no prize for getting lower or staying longer. You can pause, adjust, or skip the movement whenever you choose. A calm and supported practice is more useful than comparing your shape with someone else’s.
When to stop
Stop and leave the pose if you notice sharp pain, numbness, dizziness, or feeling unwell. Return to a steady position with support and allow yourself to settle. If symptoms are severe, unusual, or do not pass, contact an appropriate health professional. Do not restart simply to check whether the same symptom happens again.
A warm-up choice
Begin with ordinary, easy movement before deciding whether to try a low lunge. Walking around the room or gently shifting weight can help you notice how you feel today. Warm-up movement should also stay comfortable. If any movement is painful or your doctor has given specific limits, follow that advice.
Pairing with other poses
A low lunge can sit beside gentle movements that are comfortable for you. Some people choose a resting shape such as Child’s Pose between sides, while others prefer standing. A sequence is optional; avoid adding poses just to make the routine longer. Keep a clear path to leave each position.
If the pose feels too intense
Make the stance shorter, raise your hands, add knee padding, or leave the floor version. You can also skip the movement without replacing it. A pose that feels too intense today may simply not suit your needs. If discomfort is recurring or worrying, ask your doctor or another qualified clinician before trying again.
If you feel little stretch
Feeling little or no stretch is not a reason to push farther. The pose may still let you practice a steady setup and relaxed breathing. Bodies differ, and sensations change with position and day. Stay within an easy range or choose another movement that your clinician has said is appropriate.
Frequently asked safety question
A low lunge should feel controlled, and you should be able to come out smoothly. Use a chair or blocks if balance is a concern, and avoid holding your breath. If you cannot set up or leave without strain, choose another option. Ask a clinician about personal limits when health or injury concerns apply.
A simple practice plan
Keep the practice brief, supported, and easy to stop. Set up on one side, take a few comfortable breaths, and exit slowly. Pause before deciding whether to try the other side. This simple plan is enough for exploration; you do not need a sequence, timer, or deeper stretch.
Before you try it
Decide first whether kneeling and a small hip movement are suitable for you. If the answer is uncertain because of pain, a condition, surgery, pregnancy, or balance concerns, check with your doctor before trying. Use support and stop when anything feels wrong. Choosing not to do the pose is always an acceptable choice.
Where to read next
For a calm, beginner-friendly start, Ranjana Sinha’s Begin Where You Are is written for people who want simple steps. Our guide to starting a home yoga practice adds a gentle routine you can follow at home.
Frequently asked questions
What does a low lunge stretch?
It may create a mild lengthening sensation at the front of the hip on the back-leg side.
Should the front knee go past the toes?
Use a comfortable position where the foot is grounded and the knee feels okay, rather than forcing a fixed alignment rule.
How long should a beginner hold it?
Start with a few comfortable breaths and stop sooner if you feel discomfort or instability.
Can I do it with a sore knee?
Ask your doctor first, and avoid the kneeling version if it causes discomfort.
Is the stretch a treatment for tight hips?
No, it is not a treatment, and it cannot promise a health result.
The bottom line
Choose support, move gently, and ask your doctor first whenever a health concern makes the pose uncertain.